deutsch     english    français     Print


1.1 SETUP


INTRODUCTION


TigerJython is a simple development environment for programming in Python. It contains all the necessary components for programming, is free and works well under Windows, MacOS and Linux. The distributions use a platform-specific embedded Java Runtime Environment (JRE 11). It is therefore not necessary to pre-install the JRE. No Java will be installed on the system and an existing Java installation will not be changed.


INSTALLATION


Download the relevant distribution and install TigerJython in any directory. The installation files are signed with an official certificate and are no risk for your computer.


Download
TigerJython for Windows (64 bit)
Download
TigerJython for Windows (32 bit)


Download
TigerJython for MacOS (V 10.8 up)


Download
TigerJython for Linux (64 bit)
Download
TigerJython for Linux (32 bit)

During installation, the actual program file tigerjython2.jar is copied into a subdirectory bin of the installation directory. For an update of TigerJython simply download and replace tigerjython2.jar.

  Download tigerjython2.jar

Note that TigerJython starts by double-clicking the application with the TigerJython icon (not on tigerjython2.jar).

Remark:
In a computer pool with JRE 11 installed, it may be sufficient to download and run tigerjython2.jar.


GETTING STARTED


Start the TigerJython-Editor either by clicking on tigerjython2.jar or by clicking on the link to the file.

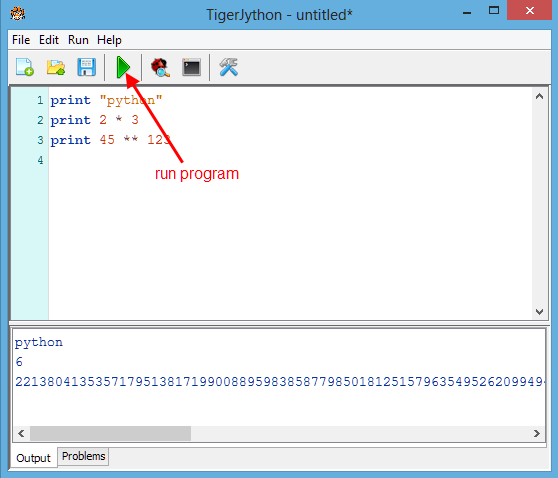
The editor is easy to operate. There are buttons for New document, Open, Save, Run program, Debugger (on/off), Display console and Settings. Test it out by typing in some print-commands, then click on the green Run program button. Unlike most other programming languages, Python can deal with numbers of any length.


EDITING PROGRAM

 
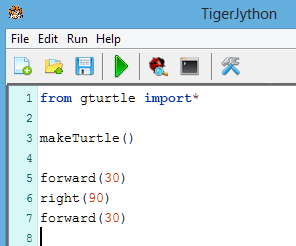
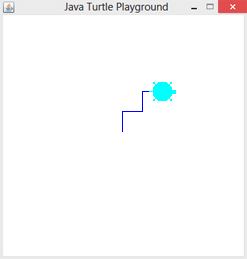
Write a simple program to create a turtle graphic


When editing, you can use standard keyboard shortcuts:

 Ctrl+C  Copy
 Ctrl+V Paste
 Ctrl+X  Cut
 Ctrl+A  Select all
 Ctrl+Z  Undo
 Ctrl+S  Save
 Ctrl+N  New document
 Ctrl+O  Open
 Ctrl+Y  Redo
 Ctrl+F  Search
 Ctrl+H  Search and Replace
Ctrl+Q  Comment out selected lines
 Remove comment
 Ctrl+D  Delete row
 Shift+
 Cursor
 Highlight


The example programs used in the tutorial are chosen so that you are able to use them easily as templates.

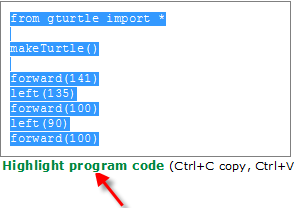
You can select the entire program by clicking on highlight program code. You can also select a part of the code by using the mouse. Use Ctrl+C to copy the highlighted code to the clipboard and Ctrl+V to paste it into your TigerJython-editor window.


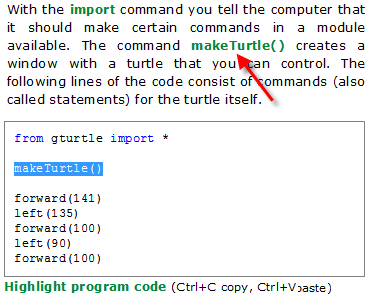
Our highlighting trick will help you find the statements that are mentioned in the text, in the program.

By clicking on words written in green, the corresponding statement is highlighted in the program.


RUNNING THE PROGRAM


  Click on the green arrow to run the program.

The graphic appears in a new window..

If something is wrong with the program, error messages will appear in the problems window


SETTINGS


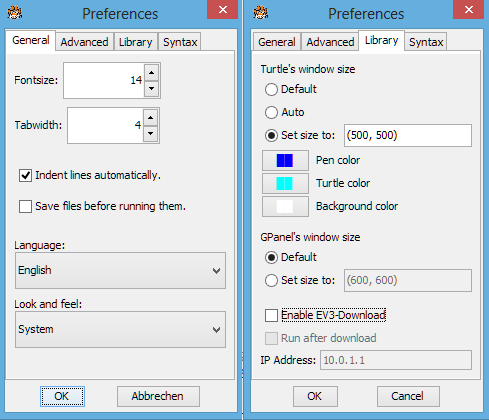
You can make some adjustments under the settings:

  • Font size, indentation and font colors of the editor
  • Language (German, English, French)
  • Default size and background color of the turtle window, pen and turtle color
  • Additional tools for enabling EV3-robotics, etc.


DOCUMENTATION


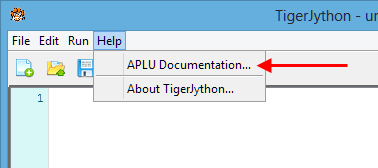
There are additional modules that are integrated into TigerJython, for example the turtle graphic. By clicking on the APLU documentation in the Help tab, you can view the documentation for these libraries.


EXAMPLES


We suggest that you work through the teaching material chapter by chapter. Transfer each example program individually to the TigerJython editor using highlight program code, Ctrl+C and Ctrl+V, save them with an appropriate name, and then execute them.

You can also download all of the programs here.


INSTALLATION IN COMPUTER LABS FOR MULTIPLE USERS


TigerJython is limited to a single JAR file tigerjython2.jar, so it is easily removable from any computer. No installation process is required and no registry entries are made. For user-definable options, a configuration file named tigerjython2.cfg is used, which is usually automatically generated in the home directory of tigerjython2.jar. In computer labs, this file can be managed by a system administrator. More information can be found here.

Note: In rare cases in computer labs, the JARs of APLU libraries (e.g. aplu5.jar) used by Java are copied into <jrehome>/lib/ext. This may lead to conflicts with TigerJython which uses specifically configured APLU libraries.


DESKTOP LAUNCHER FOR UBUNTU


Download image file tjlogo64.png from here and copy it into the directory where is tigerjython2.jar.

For newer versions of Ubuntu, the gnome-panel must be installed:
sudo apt-get install gnome-panel
Generating the launcher file by pressing Alt-F2 and entering
gnome-desktop-item-edit --create-new ~/Desktop
The dialog box fill (path to adjust tigerjython2.jar):

Click on the icone and specify the downloaded image file tjlogo64.png. Confirm with OK.


STARTING A PROGRAM WITHOUT THE TIGERJYTHON IDE


Since Python is an interpreted language, it is necessary that the interpreter is started to execute a program script. Under Windows you may run a script from the command line with

java -jar jython.jar <prog.py>

provided that the current directory contains jython.jar and the script.

To ensure that the additional modules from the APLU library are automatically loaded, they have to be included in the JAR file. Here you can download a modified jython.jar (named ajython.jar) that contains the modules. Check the readme.txt in the download to get more information how to proceed. Be aware that some TigerJython specific language features are missing, especially the repeat structure and some input dialogs. However it is not necessary that Python or Jython are installed.